Let's brew a vsphere lab at home
07 Mar 2023VMWare Home Lab Setup
I have been reminiscing about some work I did while at VMWare. Since most software that this virtualization giant creates is targetted for fat cats running datacenters, it’s way too expensive for folks like myself to purchase a one time license. Luckily, vmware provides an evaluation license (for 60 days) using which we’ll create the vmware vsphere based lab at home. Follow along:
PRE-REQUISITES:
- ESX iso installer
- vSphere installer iso
- A machine with atleast 32GB of RAM, 4 processors (~ total 8 cores), 500 GB of disk (preferably SSD)
- even in the small configuration (Tiny), vSphere needs around 14 GB/2vCPUs and around 100G of disk space
- ESX itself would require 4GB/2vCPUs
- VMWare workstation 15.x and above (virtualbox is way slower)
Steps:
Setting up ESXi
- Install ESXi on the workstation as you would any other VM (but use custom setup)
- HW compatibility at 15.x
- at least 2 vCPUs and 4GB of RAM
- 2 network adapters (1 configured for NAT and other a host-only network, configure workstation using network editor so your host only network is a part of the 172.x subnet
- around 5GB of backing store for the OS (10 is preferred, preferrably on an SSD)
- Log into the console and configure the management network by assigning a static IP on it,
- I prefer keeping ipv6 disabled
- DNS server addr = gateway IP
- From troubleshooting options, enable ESXi shell and SSH
- Once all config done, turn it off (F2)
- Add another vDisk (100 GB recommended, since vSphere VM itself needs around 50G, even with thin provisioning) and then turn the VM on.
DIGRESSION
Before proceeding, let’s take a detour understanding basic virtual Networking:
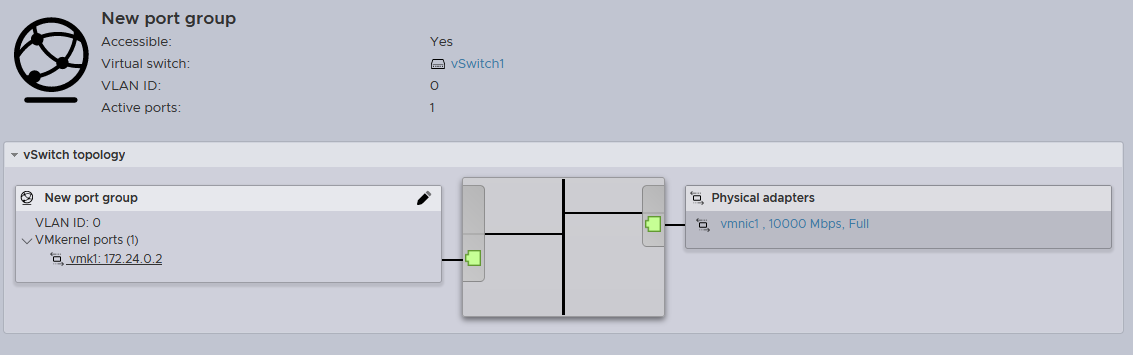
Shown below is the network topology that we want to achieve. On the left is a ‘vmknic’, a logical endpoint for ESXi kernel through which it talks to the outside world. On the right we have the vmnic, which represents the newly added (v)NIC.
To re-iterate these concepts, here are the vmknic details:
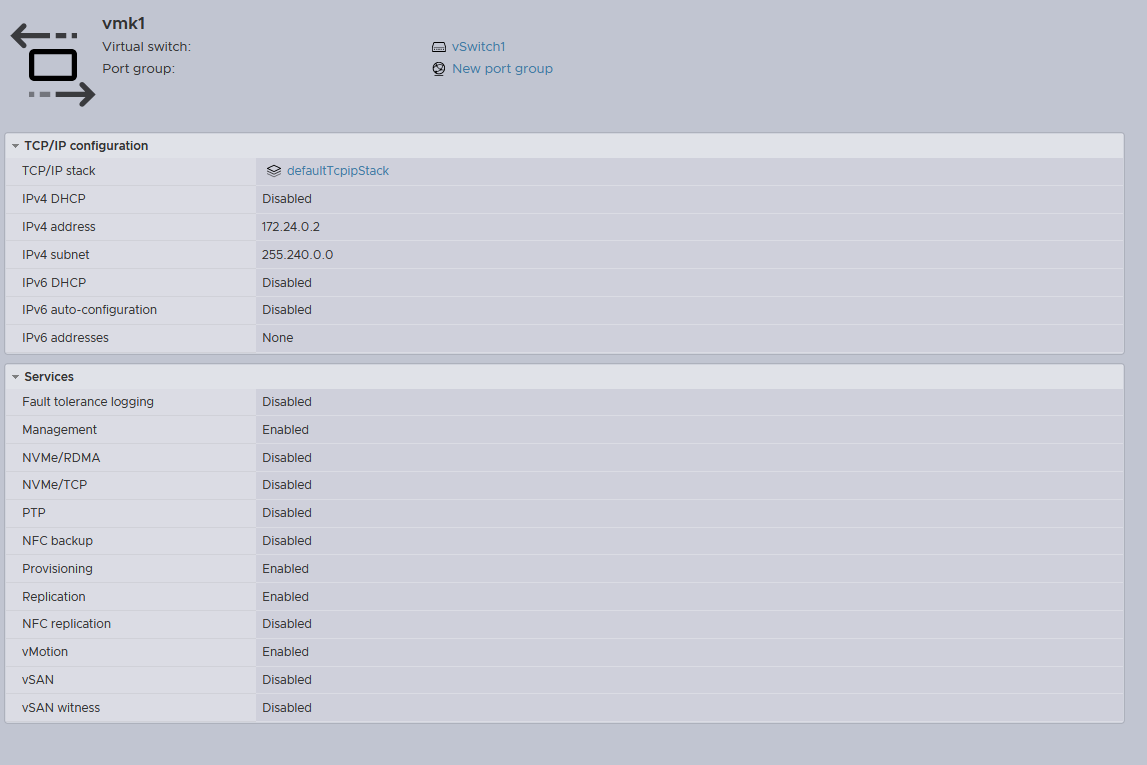
Notice the absence of attributes like the MAC address, link speed etc. Hence this is no more than a logical endpoint for the vmkernel, and is used for things like vMotion, vSAN etc
Here are the details pertaining to the corresponding vmnic:

As expected, it has details pertaining to link speed, it’s PCI address, MAC address etc. Now back to where we left
Setting up ESXi (contd.):
- Log into through the web interface https://{ip-address-of-mgmt-networkadapter} .
- From storage tab, create a VMFS datastore over the newly added 100GB disk
- From networking tab, create a new vSwitch and select the host-only vNIC as it’s uplink
- add a new vmknic to this vSwitch . every vmknic is part of a portgroup, so this new vmknic will be part of a portgroup that we’ll call StoragePG . this vmknic should be configured with static IP in the 172.x subnet and once configured make sure it is pingable from host
vCenter Server Setup:
- Extract/Mount the ISO
- Navigate to
\VMware-VCSA-all-8.0.0-21216066\vcsa-cli-installer\templates\install - copy
embedded_vCSA_on_ESXi.jsonto\VMware-VCSA-all-8.0.0-21216066\vcsa-cli-installer\win32
This is how it looks:
{
    "__version": "2.13.0",
    "__comments": "Sample template to deploy a vCenter Server Appliance with an embedded Platform Services Controller on an ESXi host.",
    "new_vcsa": {
        "esxi": {
            "hostname": "<FQDN or IP address of the ESXi host on which to deploy the new appliance>",
            "username": "root",
            "password": "<Password of the ESXi host root user. If left blank, or omitted, you will be prompted to enter it at the command console during template verification.>",
            "deployment_network": "VM Network",
            "datastore": "<A specific ESXi host datastore, or a specific datastore in a datastore cluster.>"
        },
        "appliance": {
            "__comments": [
                "You must provide the 'deployment_option' key with a value, which will affect the vCenter Server Appliance's configuration parameters, such as the vCenter Server Appliance's number of vCPUs, the memory size, the storage size, and the maximum numbers of ESXi hosts and VMs which can be managed. For a list of acceptable values, run the supported deployment sizes help, i.e. vcsa-deploy --supported-deployment-sizes"
            ],
            "thin_disk_mode": true,
            "deployment_option": "small",
            "name": "Embedded-vCenter-Server-Appliance"
        },
        "network": {
            "ip_family": "ipv4",
            "mode": "static",
            "system_name": "<FQDN or IP address for the appliance. Optional when the mode is Static. Remove this if using dhcp.>",
            "ip": "<Static IP address. Remove this if using dhcp.>",
            "prefix": "<Network prefix length. Use only when the mode is 'static'. Remove if the mode is 'dhcp'. This is the number of bits set in the subnet mask; for instance, if the subnet mask is 255.255.255.0, there are 24 bits in the binary version of the subnet mask, so the prefix length is 24. If used, the values must be in the inclusive range of 0 to 32 for IPv4 and 0 to 128 for IPv6.>",
            "gateway": "<Gateway IP address. Remove this if using dhcp.>",
            "dns_servers": [
                "<DNS Server IP Address. Optional when the mode is Static. Remove this if using dhcp.>"
            ]
        },
        "os": {
            "password": "<Appliance root password; refer to --template-help for password policy. If left blank, or omitted, you will be prompted to enter it at the command console during template verification.>",
            "ntp_servers": "time.nist.gov",
            "ssh_enable": false
        },
        "sso": {
            "password": "<vCenter Single Sign-On administrator password; refer to --template-help for password policy. If left blank, or omitted, you will be prompted to enter it at the command console during template verification.>",
            "domain_name": "vsphere.local"
        }
    },
    "ceip": {
        "description": {
            "__comments": [
                "++++VMware Customer Experience Improvement Program (CEIP)++++",
                "VMware's Customer Experience Improvement Program (CEIP) ",
                "provides VMware with information that enables VMware to ",
                "improve its products and services, to fix problems, ",
                "and to advise you on how best to deploy and use our ",
                "products. As part of CEIP, VMware collects technical ",
                "information about your organization's use of VMware ",
                "products and services on a regular basis in association ",
                "with your organization's VMware license key(s). This ",
                "information does not personally identify any individual. ",
                "",
                "Additional information regarding the data collected ",
                "through CEIP and the purposes for which it is used by ",
                "VMware is set forth in the Trust & Assurance Center at ",
                "http://www.vmware.com/trustvmware/ceip.html . If you ",
                "prefer not to participate in VMware's CEIP for this ",
                "product, you should disable CEIP by setting ",
                "'ceip_enabled': false. You may join or leave VMware's ",
                "CEIP for this product at any time. Please confirm your ",
                "acknowledgement by passing in the parameter ",
                "--acknowledge-ceip in the command line.",
                "++++++++++++++++++++++++++++++++++++++++++++++++++++++++++++++"
            ]
        },
        "settings": {
            "ceip_enabled": true
        }
    }
}
From the above JSON, cull the comment from CEIP and set it to disabled
    "ceip": {
        "settings": {
            "ceip_enabled": false
        }
    }
Next, change the OS section so that it looks like this (skip the hint, of course):
        "os": {
            "password": "SomeSillyPwd", <--- used by the 'root' user
            "time_tools_sync": true,
            "ssh_enable": true
        },
Next, unless you have a properly configured DNS server, set it to the loopback address like so (skip the hint, of course):
        "network": {
            "ip_family": "ipv4",
            "mode": "static",
            "system_name": "192.168.160.170", <--|
            "ip": "192.168.160.170", <-----------| - both of these should be the same if no DNS server configured
            "prefix": "24",
            "gateway": "192.168.160.2",
            "dns_servers": [
                "127.0.0.1" <--- set it to loopback address is no DNS server configured
            ]
        },
Finally in the appliance section, change the deployment_option to tiny and make sure thin_disk_mode is set to true.
Finally, note that we have two password sections in the config. One of them is the os section described above. It is used for logging the ‘root’ user into the VAMI (Virtual Appliance Management Interface) accessed via “https://{vcsa-address}:5480”, where vcsa-address in this case is 192.168.160.170. Second in the password for user Administrator for the vsphere.local domain name. It is this user that will actually administer the vSphere web client interface available at “https://{vcsa-address}/ui”.
        "sso": {
            "password": "SomeSillyPwd1",
            "domain_name": "vsphere.local"
        }
Finally, make sure all other details are properly matching and then save the file. Navigate to \VMware-VCSA-all-8.0.0-21216066\vcsa-cli-installer\win32 and run the following command: .\vcsa-deploy.exe install --accept-eula --skip-ovftool-verification --verbose --no-ssl-certificate-verification embedded_vCSA_on_ESXi.json
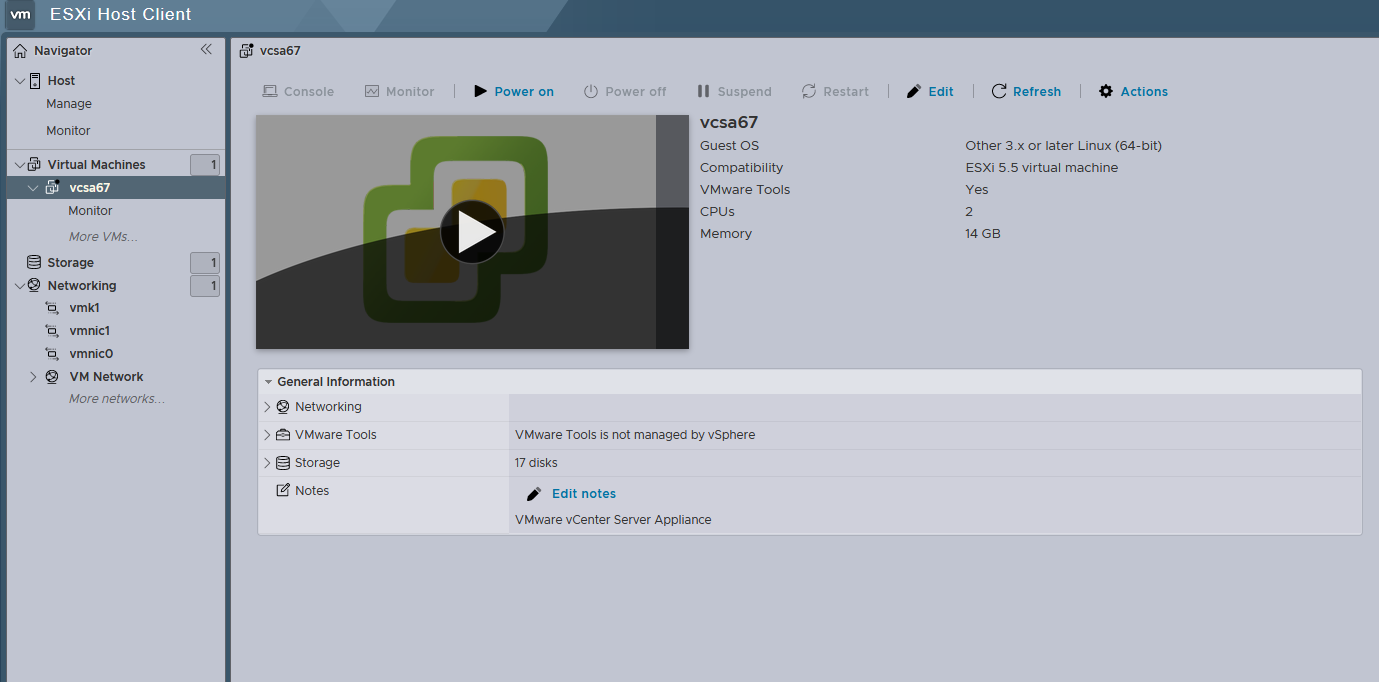
If everything goes fine, you’ll see a VM in the virtual machines section of ESXi. It took me little more than 90m for this to get deployed. This is nested virtualization in action.
Finally, turn the VM ON, it will take around 15m to be fully ON. Wait until you see the vCenter console like this:
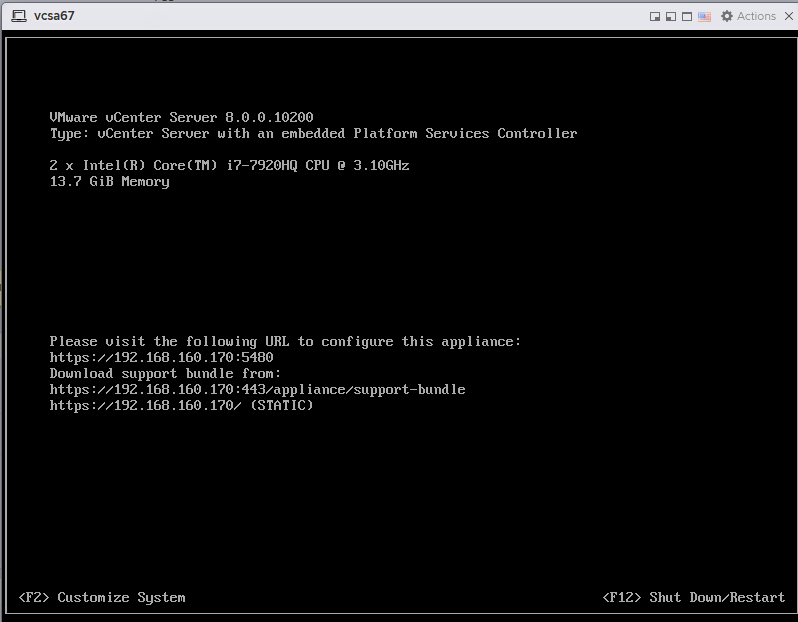
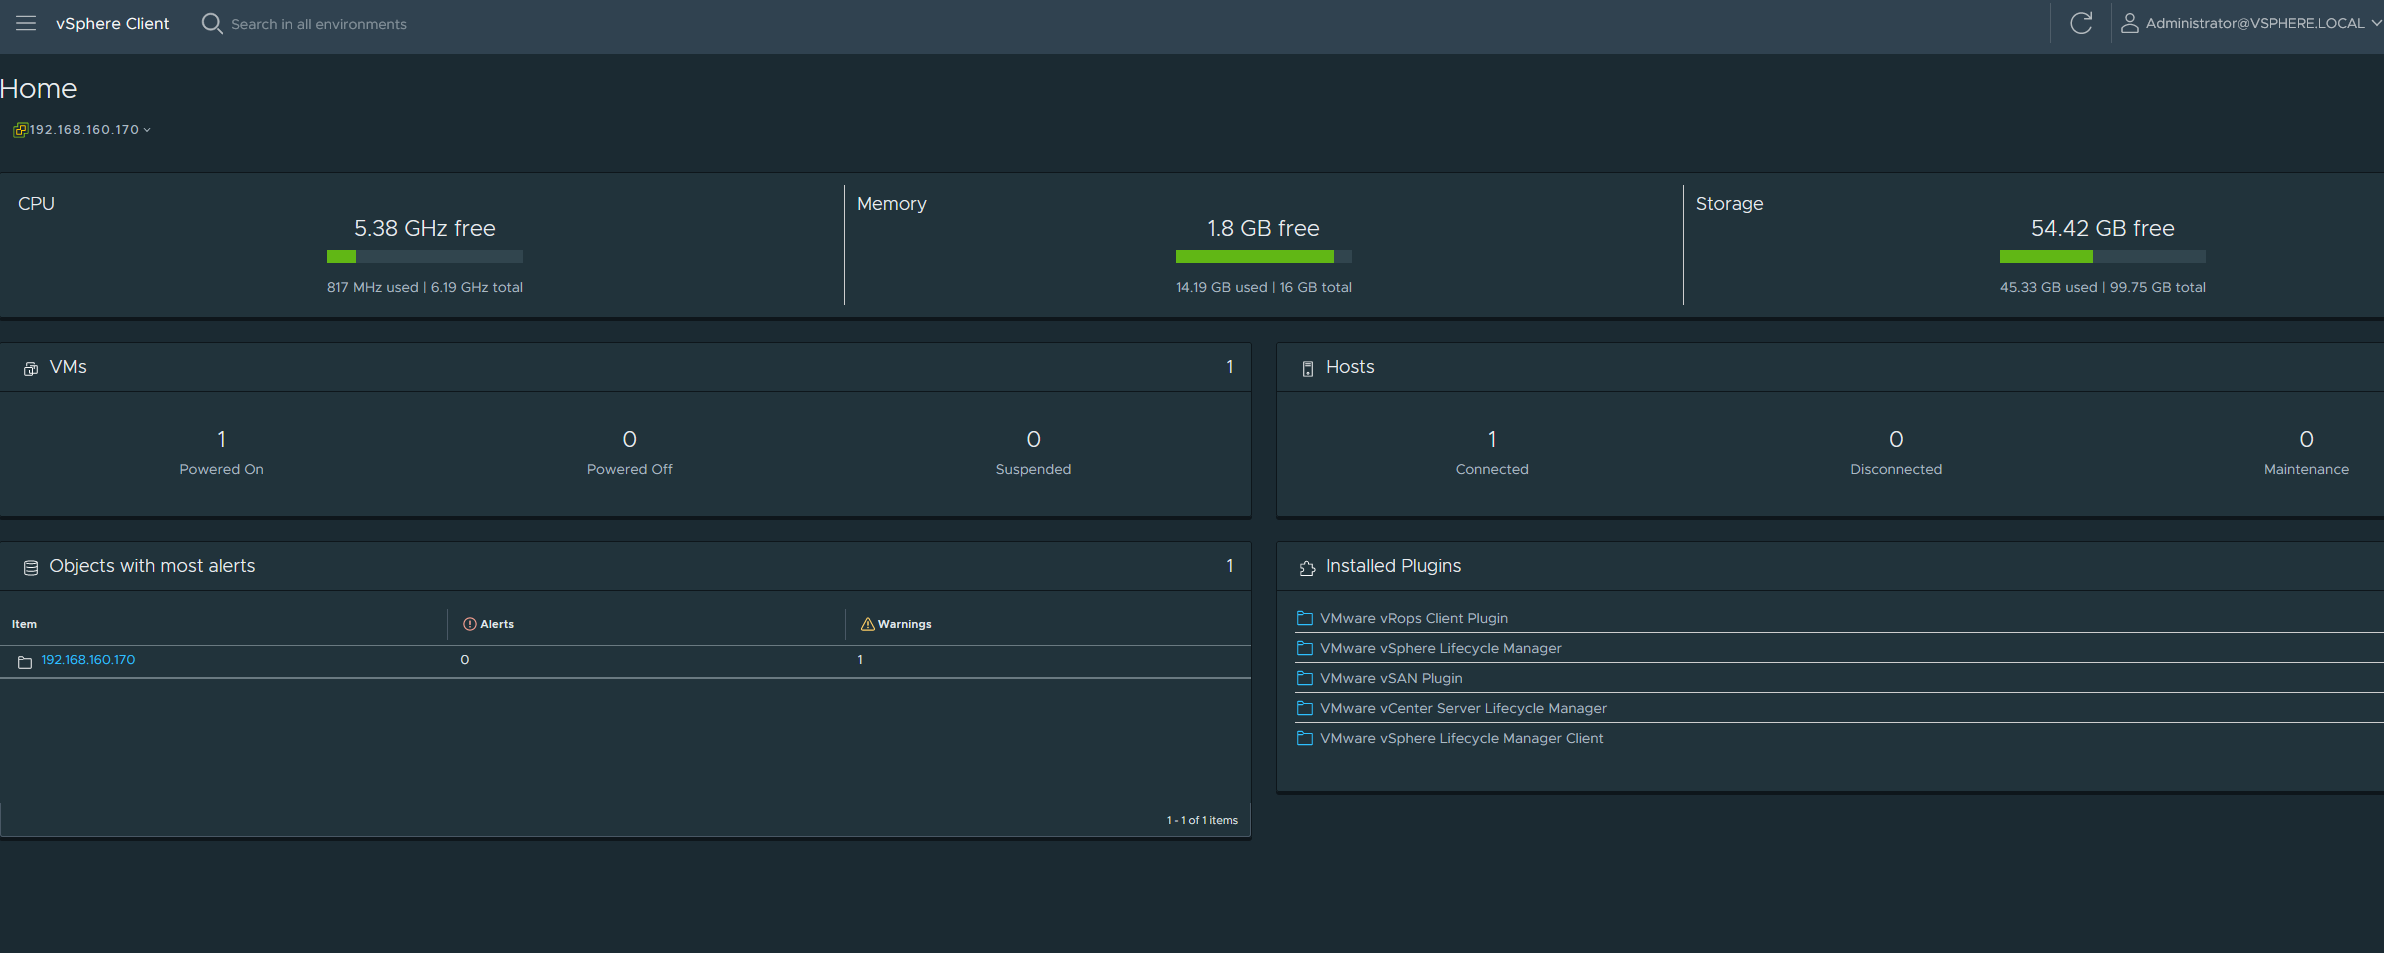
Hover your mouse over this and log in using the root user. Make sure that the management network is what you had setup in the JSON file above and that it is static. Next log into the web client interface at https://192.168.160.170/ui using the Administrator@vsphere.local account and the SSO password that you set up in the JSON above. It should look like this:
Then log into the VAMI at https://192.168.160.170:5480/ with the Administrator@vsphere.local account and check the services tab to make sure the vSphere client service is healthy and started. Often times on systems with restricted resources, this service takes time to start. Your CPU fans are blowing at max speed when this service starts and once when CPU utilization is back to ‘normal’ (aka not 100%), most often your vSphere client service has started.

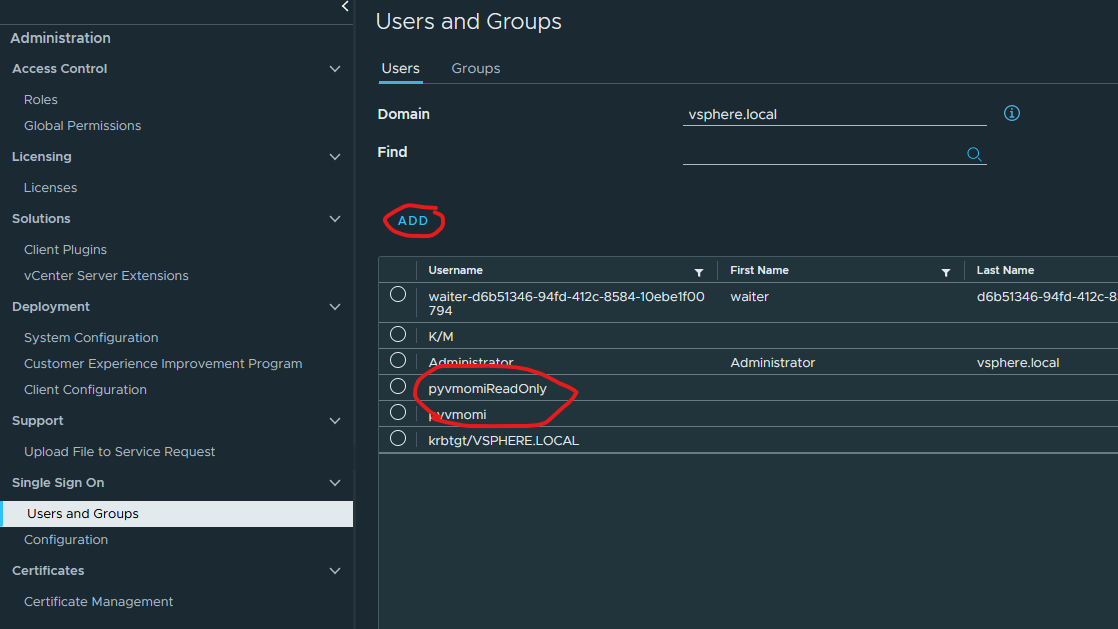
Finally we can now log into the vSphere client with our SSO credentials. Once in, navigate to the Administration section (using the hamburger menu) and under Single Sign on, click on ‘Users and Groups’, then select the Users tab and add two new users, pyvmomi and pyvmomiReadOnly for the ‘vsphere.local’ domain.
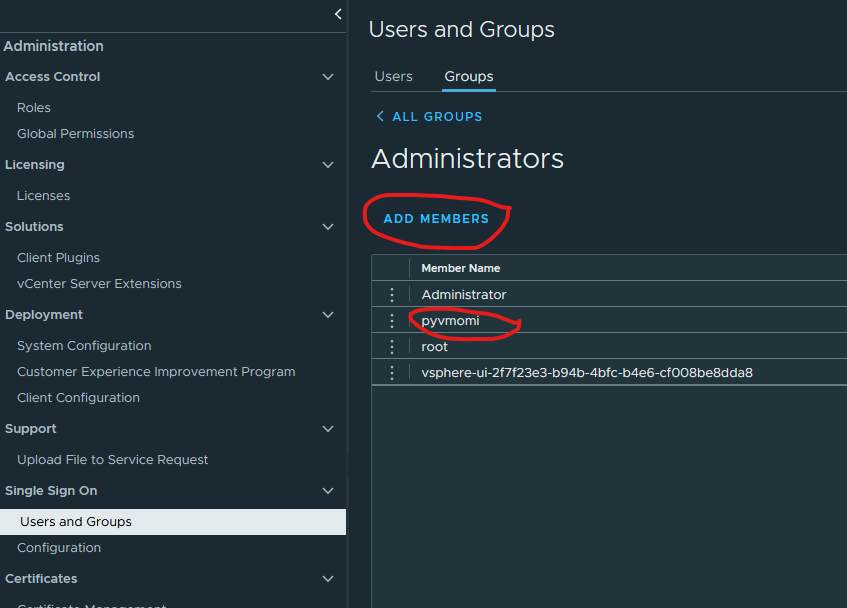
Next, navigate to the Administrator group under the ‘Groups’ tab and click on the ‘Administrators’ group. Add the pyvmomi user to this group:
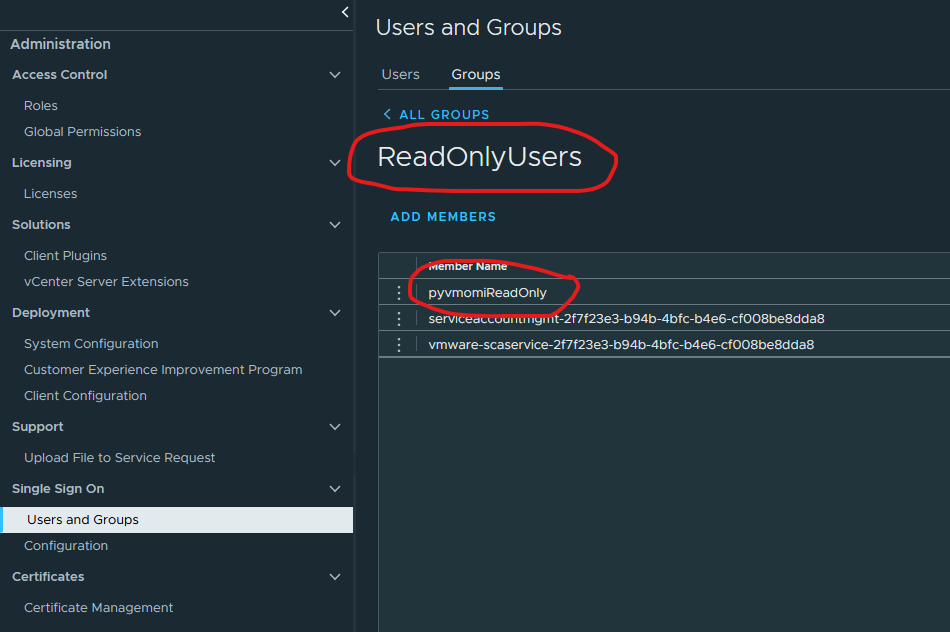
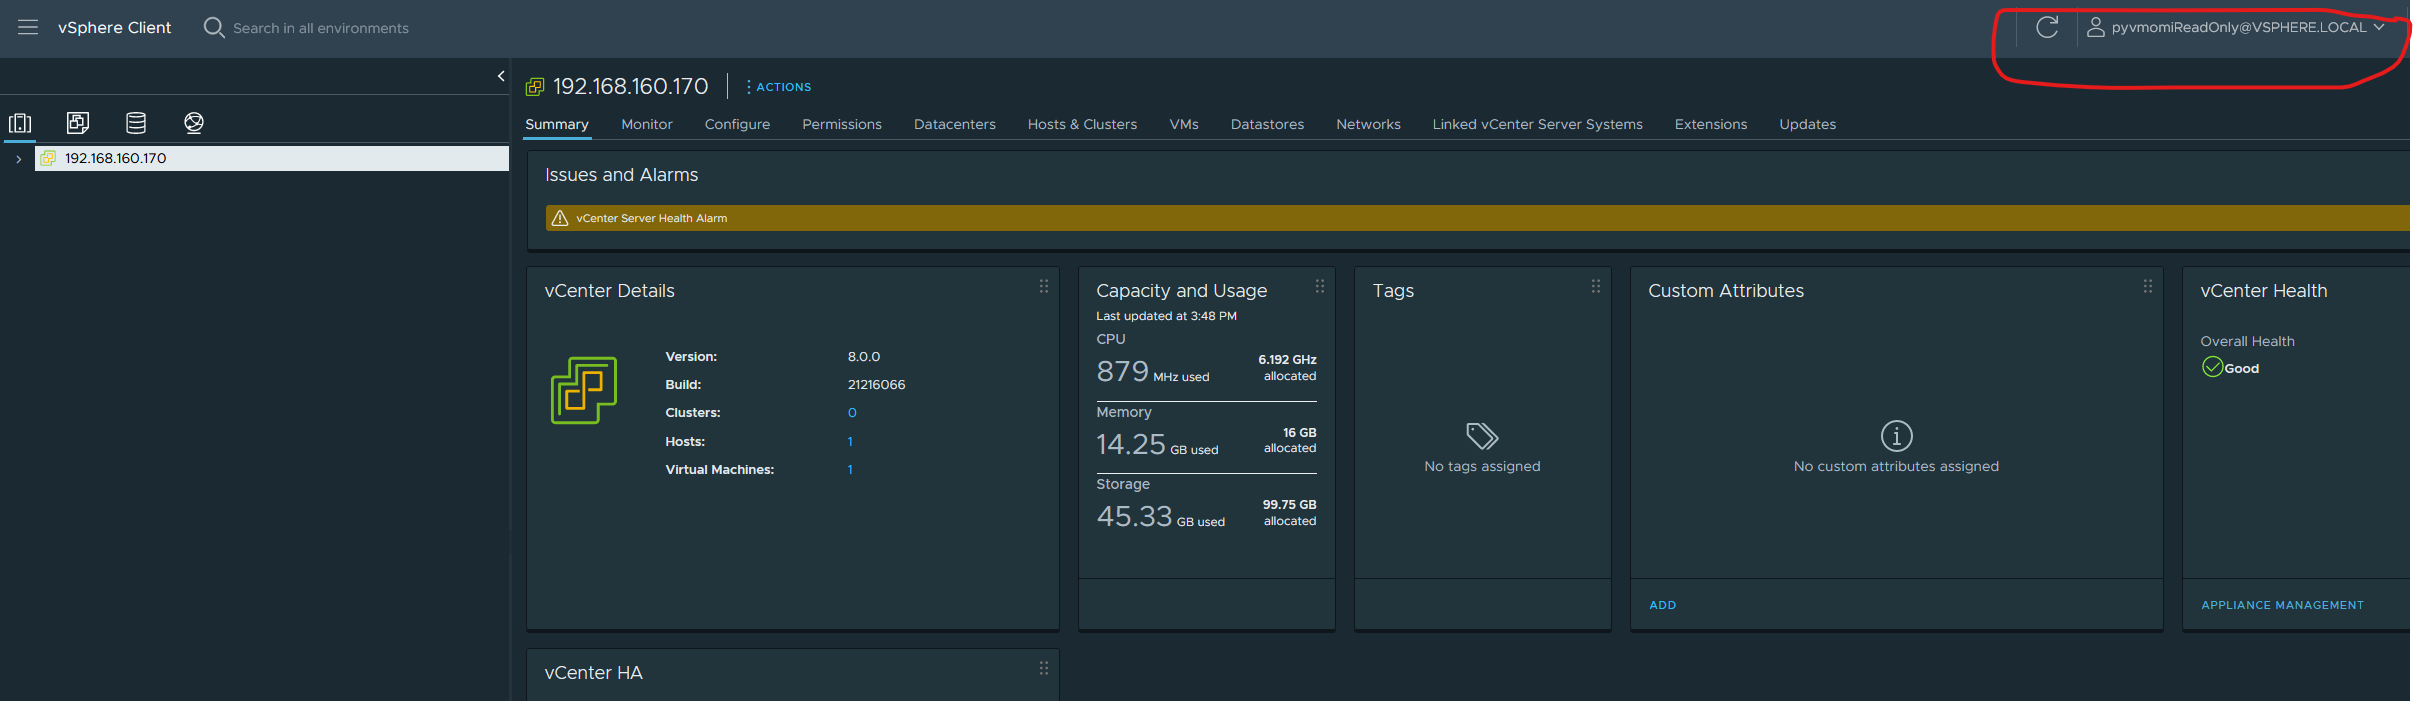
Next, under the groups tab, search for readonly (single word), select the ReadOnlyUsers group and add pyvmomiReadOnly user to it
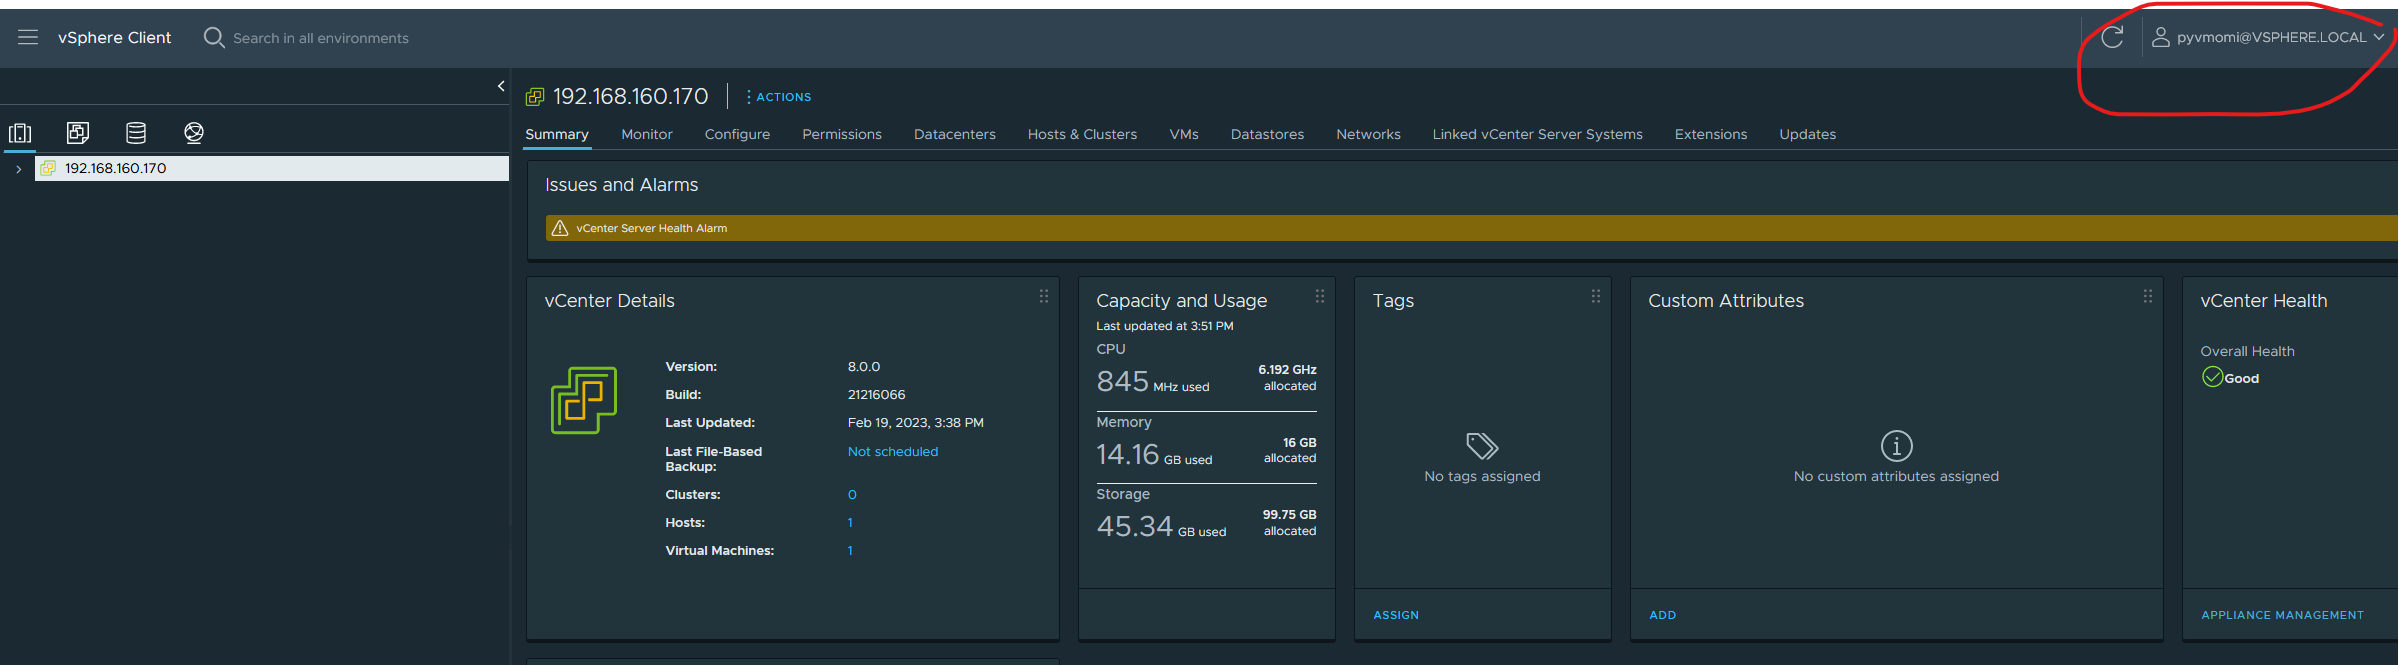
Finally log in with these credentials to ensure that they have been created
pyvmomiReadOnly
pyvmomi
This completes our initial basic setup
Testing the setup
Retrieving information from the vcenter server
We’ll test our setup with a small python script that lists all VMs on the Vcenter Server Appliance (henceforth referred to as vcsa). Install pyvmomi, preferably in a virtualenv if you don’t want to have it installed system-wide.
Once done, run the script like so: python.exe .\listVMs.py ${vcsaHostIp} pyvmomi@vsphere.local ${SSO Password} 443. It will print the name(s) of VMs and the datacenter(s). In my case here, I have just one VM, which is the vcsa VM and a single datacenter.
Creating a new VM
A VM is an object, which (much like a real machine), is made up of many other objects that work together to run it. Imagine things like a vdisk, vCPUs, network adapters, SCSI controllers and the likes. All this constitutes the ‘configuration specification (ConfigSpec)’ of that particular VM and is the basis of VM construction through pyvmomi (or any other automation tool).
Needless to say, elements within the config spec are all represented by objects. These objects are all linked together in a sort of a tree (hierarchical ordering) with the VM object (that which describes a VM) at the ‘root’. So it looks somewhat like this: VM
Configuration Specification
|---->Devices
      |---->Network device
      |-------->Link1
      |-------->Link2
      |---->Disk Controller
      |-------->Disk1
      |-------->Disk2
We refer to this example from the pyvmomi community samples. A brief snippet from it is shown here:
def create_vm(si, vm_name, datacenter_name, host_ip, datastore_name=None):

    content = si.RetrieveContent()
    destination_host = pchelper.get_obj(content, [vim.HostSystem], host_ip)
    source_pool = destination_host.parent.resourcePool
    if datastore_name is None:
        datastore_name = destination_host.datastore[0].name

    config = create_config_spec(datastore_name=datastore_name, name=vm_name)
    for child in content.rootFolder.childEntity:
        if child.name == datacenter_name:
            vm_folder = child.vmFolder  # child is a datacenter
            break
    else:
        print("Datacenter %s not found!" % datacenter_name)
        sys.exit(1)

    try:
        WaitForTask(vm_folder.CreateVm(config, pool=source_pool, host=destination_host))
        print("VM created: %s" % vm_name)
    except vim.fault.DuplicateName:
        print("VM duplicate name: %s" % vm_name, file=sys.stderr)
    except vim.fault.AlreadyExists:
        print("VM name %s already exists." % vm_name, file=sys.stderr)
‘si’ is the service instance that is obtained by way of the connect.SmartConnect function, usage of which was described in the ‘listVMs.py’ file above. The destination_host is an object that denotes the host on which we’d like to host our new VM. A ‘resource pool’ is what the name says it is, aka a pool of resources. From the perspective of a host machine, all the physical resources that a host provides are it’s resources. With vSphere, since everything has been engineered from the ground up with distributed computing in mind, vSphere first clusters all discrete resources from all hosts in the datacenter and then flattens it. This is then referred to as a ‘resource pool’ and can then be used within
the vim ecosystem as a shared resource. This is a crude explanation of it, but I hope we get the picture. Here is the official documentation from vmware.
If the user has no preference for a particular datastore, the very first datastore belonging to the host is selected. Next, a ‘config spec’ as described above is created from scratch using the create_config_spec routine which looks like this:
def create_config_spec(datastore_name, name, memory=4, guest="otherGuest",
                       annotation="Sample", cpus=1):
    config = vim.vm.ConfigSpec()
    config.annotation = annotation
    config.memoryMB = int(memory)
    config.guestId = guest
    config.name = name
    config.numCPUs = cpus
    files = vim.vm.FileInfo()
    files.vmPathName = "["+datastore_name+"]"
    config.files = files
    return config
As can be seen, the datastore name as well as the VM name are required parameters whereas other parameters have default values. Lets take a sneak peek at the vim.vm.ConfigSpec object provided by vmware. Here’s more on that. As we can see from that, it has a bunch of properties, almost all of them optional (btw isn’t it weird vmware marks all optional properties with a '*' ?). But what good is a VM without many of those properties anyways, which is why we add a bunch of properties here. This routine creates a VM with no network or storage controllers. We can extend this by adding a bunch of devices as part of the deviceChange property (which is of type VirtualDeviceConfigSpec). Let’s add a NIC to it like so:
vmControllers = []

nicspec = vim.vm.device.VirtualDeviceSpec()
nicspec.operation = vim.vm.device.VirtualDeviceSpec.Operation.add
nic_type = vim.vm.device.VirtualVmxnet3()
nicspec.device = nic_type
nicspec.device.deviceInfo = vim.Description()
nicspec.device.backing = vim.vm.device.VirtualEthernetCard.NetworkBackingInfo()
nicspec.device.backing.network = net_name
nicspec.device.backing.deviceName = net_name.name
nicspec.device.connectable = vim.vm.device.VirtualDevice.ConnectInfo()
nicspec.device.connectable.startConnected = True
nicspec.device.connectable.allowGuestControl = True
vmControllers.append(nicspec)
Documentation on the virtual device object is here. This gets extended by various virtual devices like a virtual NIC, virtual Disk, virtual floppy etc, each providing some unique set of attributes making sense for only that particular device type. In this case we are adding a vmxnet3 device as the NIC.
In a similar manner, we now add a SCSI controller:
    # SCSI controller
    scsi_ctlr = vim.vm.device.VirtualDeviceSpec()
    scsi_ctlr.operation = vim.vm.device.VirtualDeviceSpec.Operation.add
    scsi_ctlr.device = vim.vm.device.ParaVirtualSCSIController()
    scsi_ctlr.device.deviceInfo = vim.Description()
    #scsi_ctlr.device.slotInfo = vim.vm.device.VirtualDevice.PciBusSlotInfo()
    #scsi_ctlr.device.slotInfo.pciSlotNumber = 16
    scsi_ctlr.device.controllerKey = 100
    scsi_ctlr.device.unitNumber = 3
    scsi_ctlr.device.busNumber = 0
    scsi_ctlr.device.hotAddRemove = True
    scsi_ctlr.device.sharedBus = 'noSharing'
    scsi_ctlr.device.scsiCtlrUnitNumber = 7
    vmControllers.append(scsi_ctlr)
A SCSI controller controls SCSI disks and sits on it’s own bus and can drive a maximum of 15 devices. More information here and here. Above values are typical values. It appears that explicitly specifying the PCI slot for the controller increases the possibility of it not getting attached. Since we are not too particular about where (on the PCI bus) this one sits, we leave it (for now).
Finally, let’s attach a vDisk to the above controller:
    # vDisk
    unit_number = 0
    controller = scsi_ctlr.device # this is the controller we defined above
    disk_spec = vim.vm.device.VirtualDeviceSpec()
    disk_spec.fileOperation = "create"
    disk_spec.operation = vim.vm.device.VirtualDeviceSpec.Operation.add
    disk_spec.device = vim.vm.device.VirtualDisk()
    disk_spec.device.backing = vim.vm.device.VirtualDisk.FlatVer2BackingInfo()
    disk_spec.device.backing.diskMode = 'persistent'
    disk_spec.device.backing.thinProvisioned = True
    disk_spec.device.backing.fileName = '[%s]%s.vmdk' % ( datastore_name, name )
    disk_spec.device.unitNumber = unit_number
    disk_spec.device.capacityInKB = sizeGB * 1024 * 1024
    disk_spec.device.controllerKey = controller.key
    vmControllers.append(disk_spec)
We can finally pass this device list to the config spec as part of the create_config_spec function so the snippet loks like so:
    config = vim.vm.ConfigSpec()
    config.annotation = annotation
    config.memoryMB = int(memory)
    config.guestId = guest
    config.name = name
    config.numCPUs = cpus

    config.deviceChange = vmControllers # <--- we added this
    files = vim.vm.FileInfo()
    files.vmPathName = "["+datastore_name+"]"
    config.deviceChange = vmControllers
    config.files = files
Having extended the config, the rest of the code is exactly as described in the sample. Our extended script for creating a ‘blank’ VM with NIC and SCSI devices attached to it is here.
After running this script, here is my ‘newVM’ created on ‘Datacenter’:
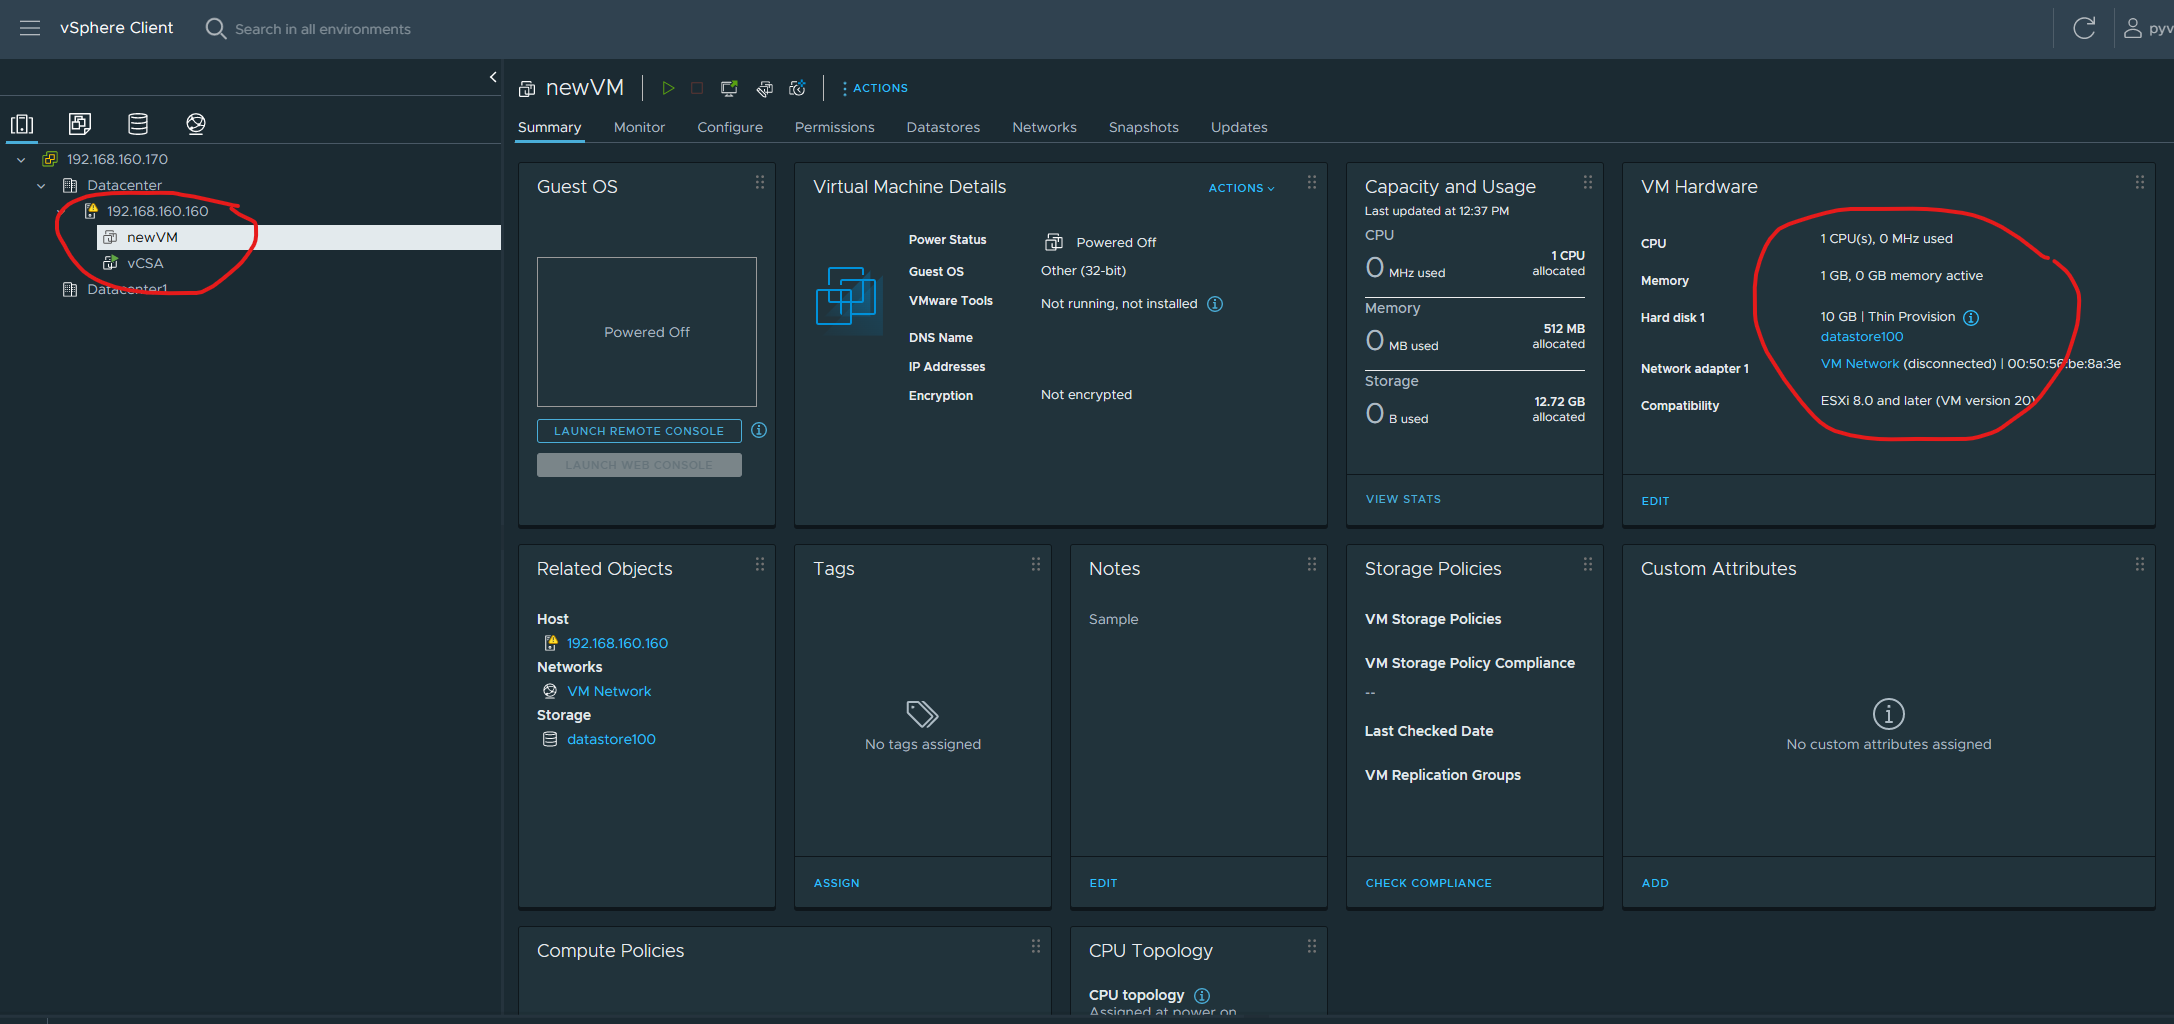
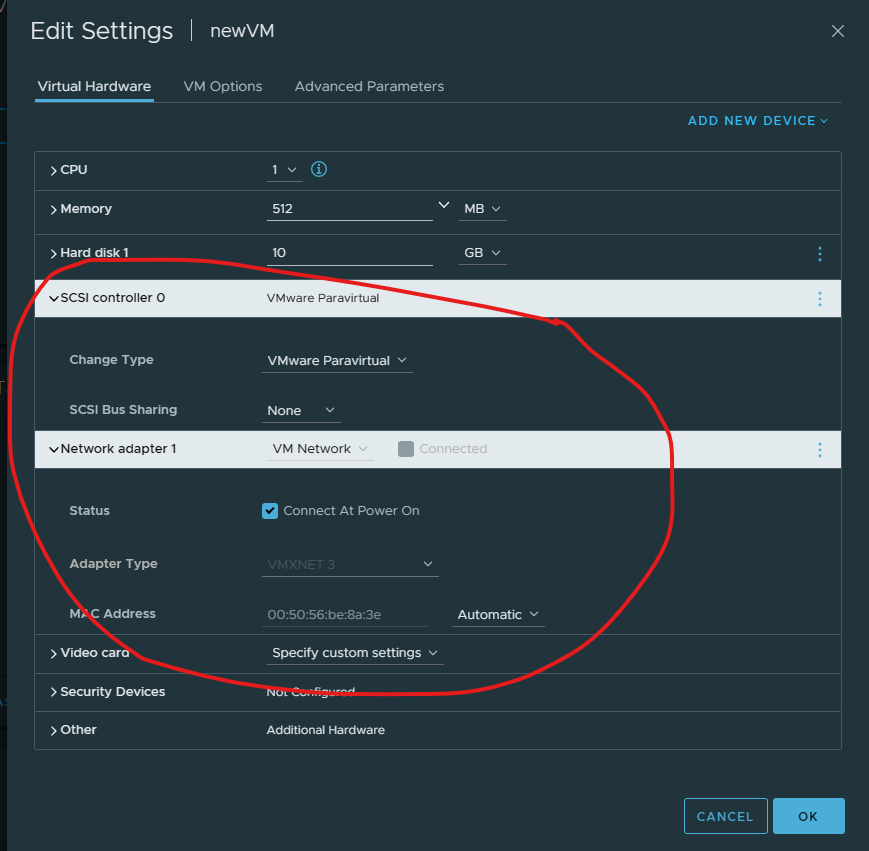
Here we see that it has a NIC and a vDisk as we specified
So finally we have a (very basic) working setup for us to experiment with!